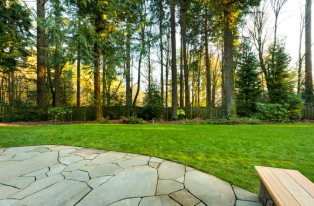
How to Build a Paver Patio (Included Cost Breakdown)
March 10, 2025
If you've decided to build a patio for your yard this spring, you're in luck! Building a patio is a great way to spend time outdoors, and doing it yourself makes it even more rewarding.
Building a patio is a project most homeowners can take on; however, if preparations aren't done properly, it can become expensive and labor-intensive. Taking the right steps now will not only help you keep and maintain a perfect patio for years, but by using the right tools and equipment, you can speed up the process and save money, as opposed to hiring a company to do it for you.
7 Steps to Building Your Own Paver Patio
-
Clearing and preparing the area.
-
Putting down the base coat of gravel.
-
Putting down the top coat.
-
Laying down the pavers.
-
Putting up the patio edging.
-
Backfilling around patio edge.
-
Filling in the joints with joint sand.
Step 1: Clearing the Area – Removing Grass, Brush & Stumps
A patio must be built on bare, stable ground. Leaving any roots, grass, or debris can cause shifting, sinking, and weed growth over time.
To begin, mark out the area for your patio. Choose a spot with little plant material and a level surface to minimize prep time and material costs.
The fastest way to get started with clearing the area is to remove any large debris, rocks, and trees. You can use an excavator or other equipment to remove large objects and move big chunks of earth. You will need to remove a decent amount of soil, and this can take hours if you are doing this by hand. You can rent a skid steer loader for about $300-400 per day and get the job done quickly.
If your area is overgrown, you can use a bush hog attachment on an excavator for around $200-$300.
If you are dealing with a lot of trees , you can rent a stump grinder to remove tree stumps and prevent uneven ground for around $100-200 per day.
Once the debris is removed, the goal is to remove around 8-10 inches of soil, just below the desired height of the patio. In the next steps, you will be laying a 4-6 inch base coat, an inch of topcoat, and then the pavers which are around 2-3 inches thick.
Once the area is cleared, do a final check to make sure everything is free of debris, then move on to the next step.
Step 2: Putting Down the Base Coat of Gravel and Compacting
For the base coat, lay down around 4-6 inches of clean ¾ gravel. Clean gravel means it does not have dust or fines in it that won’t allow water to drain well. Gravel will cost around $51-68 per cubic yard, which translates to $1-$1.26 per square foot of patio area.
It is recommended to lay a couple of inches of gravel down and then flatten the area. You could do this with a hand tamper, or you can rent a compactor attachment for your excavator for around $200-300 for the day to speed up the process tremendously.
After each layer, you can lay down commercial-grade landscape fabric to help lock the layers in place and minimize settling.
After the base coat is in place, the final grade should be pitched ⅛" per foot, with a remaining height of 1 inch + the thickness of the paver from the finished height.
Step 3: Choosing and Laying Down the Top Coat
The top coat for a patio is usually clean chip stone, ¼" or ⅜". Clean chip stone can still get packed tight, but also allows water to flow easier.
The top coat must be screeded and pitched properly (⅛ inch per foot) so that the pavers will sit as they should. An easy trick to do this is to lay some steel pipes or something similar and use a 6-foot level to get the grade that you want. At this point, the top of the steel pipes needs to be at the level with the bottom of the pavers. Then you can begin to add the chip stone.
Just add a little top coat at a time and screed it to the steel pipes with a long straight edge. Do not walk on the chip stone after it is screeded. When you get to the end of your pipes, slide them down and repeat until you have completed the whole patio. You can fill the troughs left by the pipes as you lay your pavers.
Step 4: Choosing and Laying the Pavers
Now it's time for the main course: laying down the pavers. Pavers come in a wide variety of designs, colors, and prices, ranging from $1-$15 per square foot, but on average they are $2-4 per square foot.
You can choose whichever kind of paver or design you like - find inspiration online!
To lay the pavers, put them down on the top coat level and square, using a rubber mallet to set them into position.
Step 5: Putting Up the Patio Edging
Once the patio pavers are in place, put up edging to ensure everything stays in place. You can buy plastic paver edging at the hardware store and lay the edging around the outside of the paver, then pound in a few 10-inch galvanized spikes to hold things in place.
Step 6: Backfill Around the Paver Patio
At this point, it is time to start polishing things up. Use your leftover topsoil and fill in around the patio edge where you may have a gap from the hole you dug earlier.
Step 7: Filling in the Joints with Poly Sand
To fill all the joints in a paver patio and lock it all together, use poly sand. You simply pour it on the pavers and sweep it into the joints with a broom, leaving some excess on top. Poly sand costs around $0.26 to $0.45 per square foot.
After the majority of the joints are filled, use your compactor to vibrate the sand deep into the joints. Be sure to use a pad under the compactor so you don’t damage your new pavers - you can use a scrap piece of carpet or a plate compactor synthetic pad.
Once this is done, sweep off the excess and wet the surface of your patio just until it starts to repel water.
Step 8: Enjoy Your Brand New Patio!
Cost Breakdown for Building a Patio (By Sq. Foot)
Essential Equipment Rental Costs (Day Rates):
-
Excavator: Around $350
-
Compactor: Around $250
Materials Cost per Square Foot:
-
Gravel Base Coat: Around $1.26 per square foot
-
Chip Stone Top Coat: Around $0.24 per square foot
-
Pavers: Around $4 per square foot
-
Joint Sand: Around $0.45 per square foot
Total patio cost per square foot: Around $5.95 per square foot.
Simply multiply the cost per square foot of the materials combined and multiply it by the desired square feet of your patio. Then add the cost of equipment rental. This should give you an estimate of how much your patio will cost in materials and equipment rentals, this does not include tools like brooms, rubber mallets or delivery fees.
Renting the right equipment is the key to successfully preparing your yard for a patio. By using professional tools like plate compactors, skid steer loaders, and laser levels , you can create a stable, level foundation that will last for years.
Understanding each step in the process ensures that your patio remains sturdy and free from drainage issues. For expert advice and a personalized rental quote, contact A to Z Equipment Rentals today !